

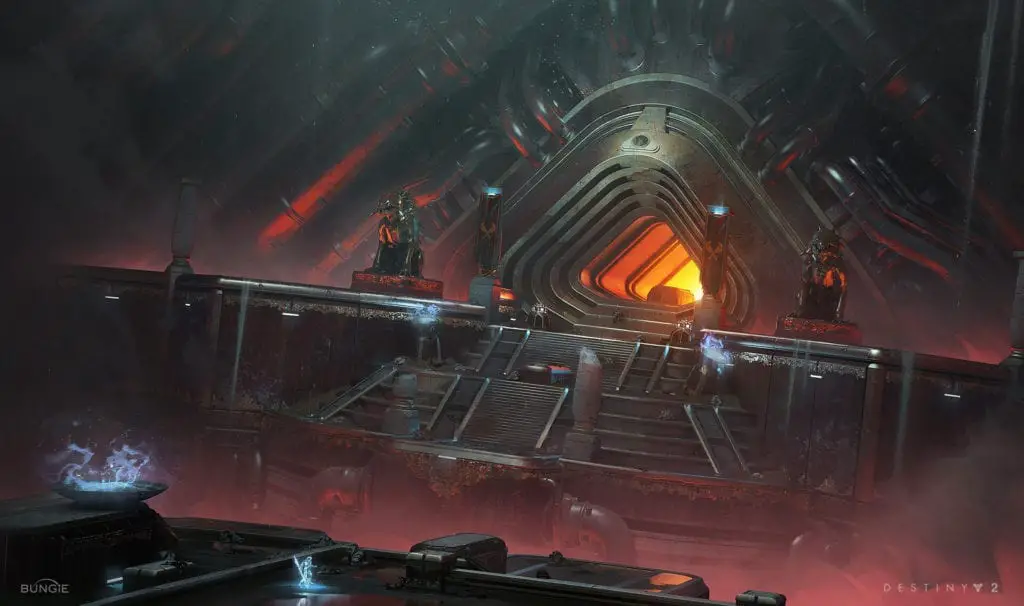
As you might already know, the new expansion of Destiny 2, named Beyond Light, came with a new raid in the Deep Stone Crypt. That location is one of the significant ones in the whole game as it has been mentioned in the Destiny universe multiple times.
It is supposed to be the place where the Exos were made initially and it stands as a significant place for Exos just like The Reef is for the Awoken and the Last City is for humans.
It is interesting that instead of the location being a full-fledged location, it is just the site of a new raid. In any case, it is an amazing place to explore and the raid that takes place there is one of the best ones that Destiny 2 has to offer.
Table of Contents
- Recommended Light Level for Deep Stone Crypt Raid
- Recommended Weapons for Deep Stone Crypt Raid
- Recommended Mods for Deep Stone Crypt Raid
- Recommended Sub-Classes for Deep Stone Crypt Raid
- Deep Stone Crypt Encounter One: Crypt Security(+ video)
- Deep Stone Crypt Encounter Two: Atraks-1
- Deep Stone Crypt Encounter Three: Rapture
- Deep Stone Crypt Final Encounter: Taniks
- Conclusion
This raid guide for the Deep Stone Crypt raid is going to cover the light level you should be at, the weapons that you should bring along with you, the weapon and armor mods that you should have equipped, the recommended sub-classes, and how to deal with each specific encounter in the raid.
Recommended Light Level for Deep Stone Crypt Raid
This particular raid requires a higher light level than other ones as it is the latest one to come out. The recommended light level for this raid is set at 1230.
That being said, if you can bump that up with good pinnacles or exotics (here is a quick exotic engram farming guide) then I would highly advise that as even a few light levels make a world of difference as you’ll take considerably less damage and will do more damage.
Recommended Weapons for Deep Stone Crypt Raid
Assault Rifles
- Gnawing Hunger
The first weapon that you should keep in your arsenal is the Gnawing Hunger, one of my all-time favorite weapons in Destiny 2. the assault rifle has little-to-no recoil and works well in both close and mid-range.
It also packs a big punch and with a magazine size close to 50, it is one of the best weapons to take into battle. It can clear out enemies in a matter of seconds and will net you a lot of orbs of light if you have it masterworked.
Pulse Rifles
You could also use any of the viable pulse rifles as those are really good at dealing with ads at a range. The buff to them makes them amazing and allows you to handle any encounter with ease. They also have really cool mods that can drastically change the experience that you have with them.
Scout Rifles
Scout rifles are viable in the second encounter as well because you’re it won’t hurt to have range when dealing with it. You could also use an SMG as their high rate of fire and quick reload make them work really well in close quarters.
Special Weapons
- Witherhoard
- (Slug-shotguns)
For the special weapon slot, you should go with the Witherhoard as that weapon is an absolute beast and can deal with a lot of ads really quickly. Keep in mind though that one person on the raid team will have to have Divinity as it is necessary to deal enough damage to the boss.
Shotguns are also a viable choice for special weapons as they deal with incredible damage and can one-shot most ads with ease. Slug-shotguns are particularly effective at boss DPS and can destroy its health in a matter of minutes.
Heavy Weapons
- Xenophage
- Anarchy
- Izanagi’s Burden
- Whisper of the Worm
As for the heavy weapons, the ones that you want for boss DPS, there are a few options that you can go with. The first is Xenophage which just shines in any PVE setting. The buff that it got makes it a viable weapon to deal with bosses but it gets no bonus from critical hits as the bullets explode.
You could also break out Anarchy but be careful as that particular grenade launcher comes with a risk of friendly fire and can ruin a raid if not used properly.
If you have experience with this weapon then you should go ahead and use it. you can potentially use any spike grenade launcher as they still deal a ton of damage and can melt bosses.
Anarchy is another popular choice but it exposes you to the dangers of self-immolation if you’re standing too close. You could also use Izanagi’s Burden or Whisper of the Worm but you need to have a great aim to do it.
A missed shot with either of those weapons means you won’t be able to do the damage that you could.
Recommended Mods for Deep Stone Crypt Raid
- Overload Mod
For the armor mods, you’re going to want to use any that give you greater ammo capacity for your heavy weapons or heavy/special ammo finder so that you don’t run out of ammo any time during the raid. Ammo is always scarce during the boss DPS phase so make sure to bring these along.
As for the weapon mods, there are two that you’re going to want. The first is any Overload mod that you can fit onto any of your weapons. There are multiple encounters with Overload enemies so you’re going to need this mod.
The second that you should bring along is any mod that helps you deal with enemies or makes your weapon more powerful. That means reload mods, minor spec, major spec, or boss spec, whichever suits your arsenal best.

Recommended Sub-Classes for Deep Stone Crypt Raid
As overpowered as Stasis is in PvP, it is not recommended for most of the endgame PvE activities. Here are each of the recommended PvE sub-classes for each of the classes:
Warlock
For warlock, you’re going to need Well of Radiance. It is a necessary aspect of any raid and there is no reason not to have at least one Warlock running this sub-class.
You can make sure that your team stays alive and with your healing well, your Well of Radiance, and your healing grenade you can make sure that your team makes it to the boss. The Well of Radiance also ensures that your team’s damage output is maximum and they can take on the boss with ease.
If you have multiple warlocks then you could also go for Nova Bomb bottom tree as that deals an incredible amount of damage, especially if you combine it with the well.
Hunter
For the hunter, you should go for the bottom tree Golden Gun with Celestial Nighthawk equipped because that is going to be essential for dealing boss damage.
This sub-class is necessary for the boss but in the other encounters, you can use top tree Nightstalker with Orpheus Rig to maximize the use of your super and deal with ads easily.
Titan
If you’re playing Titan then you should definitely go for the bubble shield (Ward of Dawn) as that will allow your team a place safe from enemy fire, will give them weapons of light and will create orbs of light that your team can use to fuel their supers.
Deep Stone Crypt Encounter One: Crypt Security(+ video)
In this encounter, the goal is to break the fuses that are powering security and thus are stopping you from going further into the crypt. This part is a little similar to the first encounter in Scourge of the Past.
In this encounter, you should divide your team into two groups of three, one for each of the light and dark rooms. In these teams of three, you’ll need a Scanner and an Operator.
The Scanner will identify which of the keypads are glowing and the operator will have to go down to the basement and shoot those specific keypads. The third person will act as an ad clearer.
The scanners will only be able to see the glowing keypads when they get a buff from Hacker vandals. The operator can only shoot the keypad in the basement if they have picked up a buff from the terminal.
The reason why this encounter is hard is that only one scanner buff will spawn so it will have to be traded between rooms through the terminal.
As soon as two of the keypads are known the operators should shoot the basement controls and go to the basement. If you go too early the room will catch fire and if you go too late then you won’t have as much time to damage the actual fuses.
When the correct keypads have been shot, the fuses will become unshielded but you can’t shoot them straight away. You need to shoot them in the correct order.
This can be accomplished fairly easily. The scanner needs to give the buff to the operator so that they can tell the original scanner which ones to shoot. To do this the original operator deposits their buff into the terminal. The ad clearer picks that one up.
The original scanner then deposits his buff into the terminal so that the original operator can pick it up and tell the new operator above which cores to shoot.
That should be all for this encounter. If the shields for the fuses go back up then the new operator can just let the original operator out of the basement and repeat the cycle with the roles switched around.
Deep Stone Crypt Encounter Two: Atraks-1
This encounter is another boss fight and works a lot like the first encounter. The team is divided into the same numbers and positions. One team goes up and the second one goes down. They each fight 4 clones of Atraks-1 by scanning which clone needs to be damaged and destroying it before the boss can wipe you.
When one of the clones dies it leaves behind a purple orb that needs to be picked up otherwise your team will get wiped.
This is where the operator comes in, the orb needs to be shot into space through the airlock otherwise it will wipe the team. The timer that the orb gives players can be reset by the operator shooting off the orb and the player picking it back up.
By transferring buffs through the terminal and changing places through the drop pods the team can successfully complete this encounter if they communicate well.
Deep Stone Crypt Encounter Three: Rapture
In this encounter, you’ll split the team up again but instead of having two roles, there are three. The new one is called a suppressor and is in charge of stunning the boss so that nuclear cores can be dunked in order to stop Taniks from destroying Europa.
The way this encounter works, the scanner will tell where the cores need to be deposited by letting players know which of the deposit slots are glowing yellow.
The operator will have to shoot the red keypads to ensure that only two cores spawn as only two can be dunked at a time. The suppressor will stand underneath the security drones and charge up, once they see the boss light up blue they have to shoot them so that the cores can be deposited.
If one of the roles gets deactivated they can transfer the buff to one of the other players through the terminal and allow the encounter to go through its six cycles. Once all the necessary cores have been deposited a hatch will open which your team has to rush through and get to the final encounter.
Deep Stone Crypt Final Encounter: Taniks
The first part of this encounter is exactly the same as the last one. The teams are divided and each person is assigned one of the three roles. They can get their buffs about half a minute after the encounter begins as that is when the three buff-bearing vandals spawn in the area.
Kill the vandals, get the buffs, and do exactly like in the previous encounter. Find out where to dunk through the scanner, stun the boss as the suppressor, and the operator will free the people trapped in void bubbles by shooting glowing parts on them.

The cores you will get by shooting the jet vents on Taniks and destroying them, two at a time.
The rest of the encounter is easy as after you complete the second part Taniks spawns a bubble around himself and surrounds himself with debris. You have to jump into the bubble over the debris but don’t get too close as that will instantly kill you.
Once you have damaged him sufficiently, he will start teleporting around. You need to deal with heavy damage during this time as he will only teleport five times before wiping you. After you’ve done this successfully you will have beaten the Deep Stone Crypt.
Conclusion
Now you know how to defeat the Destiny 2 Deep Stone Crypt Raid, go on, and show off your new knowledge to your friends! If you need more help preparing for the raid, we have a Fast Glimmer Farming Guide for Destiny 2!