
In Resident Evil 8 (Resident Evil Village), there are countless locations that you will find appealing. The collectibles are something extra in the game that will make your experience with the game even more enjoyable. This guide will help you with all 20 of the goat warding locations. With these locations, you will never be truly done and satisfied with Resident Evil.
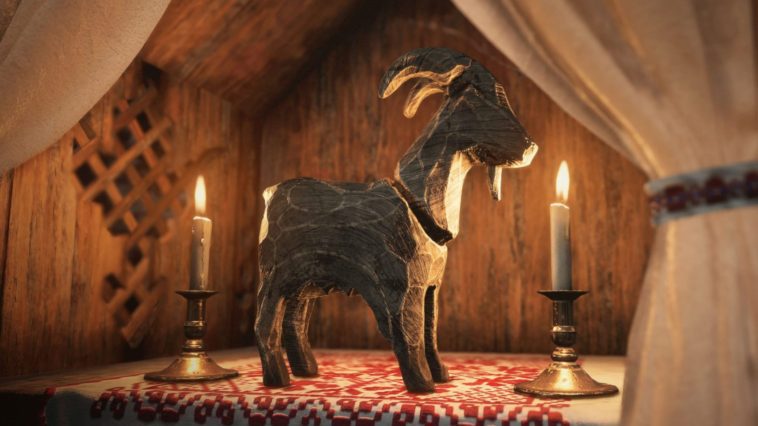
These goat statues are used and worshipped by the residents of the villages. The statues are a form or way to represent Mother Miranda. When you find the first statue you will notice that on the plaque it says that if you cause any harm or destroy this statue you will face mother Miranda’s wrath.
Though in previous generations of resident evil, finding such collectibles gained you in-game rewards. Although this version of resident evil will give you a trophy or an achievement at most, which sucks. This is something to satisfy those gamers who crave the complete completion of resident evil.
When you enter the village, you’ll find a shrine on the path that leads to the mausoleum. When you get near the goat, it’ll start making a rocking sound that can be easily recognized. To register that you’ve collected the item, you’ll need to destroy them; either with a knife or by shooting at it. When the item is registered by destroying them, it won’t appear again, so keeping track of them is very easy.
Goats of warding locations
In this article, you’ll find every location of all 20 goats that are hidden within the game. At some locations, there is more than one goat, such as at the Reservoir and the Heisenberg Factory.
Maiden at war
When you enter the village which has a shrine in it, towards the graveyard, you’ll find the first goat of warding.
Graveyard
Here you will have to be careful and look at the church’s roof to spot the goat. Try to look at the left side of the church. Once you locate it, you can snipe and easily destroy the second goat of warding.
Fallow plot
As you enter the field, you’ll encounter a horde of Lycans. After defeating them, you’ll need to go over the fences, and there you will see a path. The path is easily missable as it is very narrow. It will lead you to a wall and there you will find the third goat of warding.
Vineyard
As you escape from Heisenberg’s dungeon, you’ll go up the elevator. After going up the elevator, you’ll have to turn right by the scarecrows. Move towards the scarecrow on the extreme side of the vineyard. The fifth goat will be on its left side. You’ll need to be extra vigilant as the goat is very missable. Try listening to the rocking sound that it makes.
Castle Dimitrescu-Attric
You’ll have to ascend the ladder from the distillery to the attic. While going up, watch directly backward as the sixth goat is on the crate.
Lone road
When you’ll be heading back from the ceremonial site, from the village. You’ll have to take a left and go down the stairs when you’ve crossed the bridge. Be careful as there will be a Lycan there at the docks. You’ll have to take a left turn in the cavern and you’ll find the seventh goat statue.
Returning to the church
Once you return to the courtyard for the second time, you will need to go behind the church and use the Iron Insignia key to get into the graveyard. Explore the area and try finding a herb. In the corner, you will find the statue of the eighth goat of warding. Right behind the mausoleum buried in the snow. You will have to be extra vigilant.
West old town
You’ll find a goat near Luther’s violin house. There’s a barn and on the roof of the shelter, you’ll find the ninth goat of the warding statue.
House Benevento
You’ll have to go behind the patio, before opening the entrances to the main house. There, you’ll find stairs that will lead you down to a miniature lawn. You’ll take a right from the bottom of the stairs and explore the area a bit. You’ll find the tenth goat of warding there, destroy the goat before you take the elevator towards the village. Regardless of the foggy atmosphere, the goat is easily visible.
Suspension bridge
You’ll need to head to the bridge and on the right side, you’ll find the goat. Now, you can find this goat when you’ve beaten Donna Beneviento or when you have completed the Resident Evil Village mannequin puzzle. On the suspension bridge, you can spot the tenth goat if you snipe to the other bridge.
Reservoir no. 1
You’ll have to go towards the first windmill right after Moreau transforms. To find the goat, you will have to circle the windmill. The goat will be somewhere close to wooden logs. Be very vigilant as the goat can be easily missed as you go down for the boss battle.
Reservoir no. 2
when you will be going across the flooded areas, trying to escape and not be seen by Moreau. You will have to look for a structure with minecarts surrounding it. You will spot a switch that will be surrounded by maggots. There, you will need to turn backward and find the wooden pole in the distance. There you will find the thirteenth goat; the goat will be at the top of the plank. This might be difficult to spot and easily missable.
Fisherman’s House
Once you have defeated Moreau, you will go back towards the fisherman’s house. There you will find a new path unlocked which will lead to catfishes. On that path, keep an eye on the right side as there will be the fourteenth goat near some garbage.
Otto’s Mill
When you reach the mill, go below the mill, and there you will find a shrine. The shrine would be in the center of the stream. In the shrine, there is the fifteenth goat which you’ll have to destroy for the achievement to be unlocked.
Lycan’s Den
When you reach the Lycan’s den, go towards the north. In the far north of that area, you will find a well in the middle along with some buckets. You will have to go down the staircase. There you will find the sixteenth goat of the warding statue.
Heisenberg’s factory no.1
When you have ascended the Grinder, you will be sucked into the ventilation tower. Once you have healed from injury, go back towards the Grinder where the seventeenth goat is hidden. You will have to look closely, as the goat would be slightly visible from the front of the bulldozer. Destroy the goat to register the item.
Heisenberg’s factory no. 2
The goat hidden here will be hard to spot and is easy to miss. When you are with the duke in the elevator. Try being extra vigilant as the goat would be visible between B1 and B3. It will be close to red grinders. To destroy it, you will have to act quickly. You can also ascend through the ladder and shoot the goat by looking directly opposite.
Heisenberg’s factory no. 3
When you receive the tank that Chris will give you. You will ascend through the lift to fight Heisenberg, who is one of the main Resident Evil Village bosses. Once you have ascended to the top, you will hear the rocking sound of the goat and will have to refer to your map. On the map, you will see a small room near the vents through which you will have to crawl. You will find the nineteenth goat near a barrel. Be sure to be vigilant as this is very easy to miss.
Megamycete
Here you will find the last goat of the warding statue. As soon as you reach Megamycete, Chris places the explosives around the Megamycete. try to spot the goat on the right side as near the pool and roots. There will be a large lady on whose base you will find the goat. When you find the last goat of a warding statue, destroy it and you’ll achieve the trophy.
YouTube Video over Locations
Wrapping It Up
These were all 20 locations of the goats of warding statues hidden within Resident Evil Village. Apart from these, there are numerous other collectible items hidden in the game. Looking and unlocking items makes the game more exciting. There are numerous mysteries and puzzles inside the game as well such as the Resident Evil Village Riverbank treasure house. Many items require hunting animals and cooking different recipes. The ability to sell items and acquire weapons and upgrades.
The game brings back the ability to be a merchant and travel across multiple adventurous opportunities. The merchant known as “The Duke” can help you upgrade, sell or buy weaponry and other items. You can also combine multiple items within the game to form new items. These combinations are very useful and you should keep an eye out for them.